Spring is the perfect time to get stuck into those DIY projects you put on hold during winter. Here are a few DIY projects you can try at home.
Spring has officially sprung and with it, a renewed sense of freedom and energy. Now is the time to pack away those heavy blankets and heaters and get your house ready for those lovely, long summer days. Now is also the time to get cracking on all those DIY projects you didn’t get round to during the winter months. The following are just a few of the DIY projects which can easily be carried out at home, for your home.
Make a bird feeder:
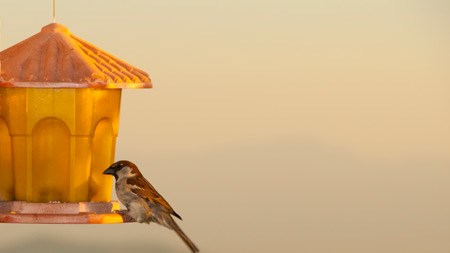
Spring is a busy time for birds and they need all the nourishment they can get. Providing water and a source of food via a bird feeder is a great way to invite these winged jewels into your garden. Shop bought bird feeders can be expensive though which is why the DIY birdfeeder option can be an attractive option. For this particular birdfeeder, all you’ll need is some inexpensive melamine tableware, rope, a drill and time.
- First, drill a hole through the centre of a melamine dinner plate, bowl and salad plate.
- Next, attach a clothes peg about 20cm’s up from the bottom of a piece of hessian rope.
- Thread the end of the rope through the dinner plate and again through a 15cm piece of stiff tubing (rubber or copper will do).
- Then thread the rope through the bowl and plate (which must face upwards).
- Tie a knot under the salad plate to prevent the plates from slipping off.
- Pull the peg down to secure the top dinner plate in place and voila! You have a cheap yet cheerful bird feeder.
Rustic mason glass jar vases:
Vases made from mason glass jars tied with ribbon are a common sight. Such jars can also be easily be glammed up with silver, copper or gold leaf. The process is simple.
- First, collect the glass jars you want to bedazzle and apply an appropriate adhesive to their exteriors (ask your local hobby shop which adhesive is best).
- Next, press sheets of the metal leaf of your choice onto the adhesive and pull away. The leaf sheets should pull away easily, creating a mottled, rustic look perfect for a country kitchen table or picnic.
Jazz up that dresser:
It’s not uncommon to have an old dresser or cabinet lying around which has seen better days. Instead of leaving said dresser or cabinet to go to waste, consider repurposing it.
- For instance, you could stagger the drawers, fill them with soil and plant plants in such a way that they cascade down to create an attractive garden feature.
- Alternatively, you could paint or emboss the drawers and create a new and unique shelf which you could attach to a wall.
- Leftover drawers could even be used to create a snazzy new pet bed with the addition of a simple pillow. The choice is yours.
Simple vertical garden:
Garden lovers without gardens (yes that means you apartment dwellers) can still enjoy a touch of the outdoors with this vertical DIY garden project. All you’ll need is a pallet, some landscaping material, staples and a staple gun, potting soil and the plants of your choice.
- First, if necessary, nail a few slats of wood to the back of your pallet for support.
- Next, measure out your landscaping material, fold it over two or three times and staple to the back of your pallet. Make sure to fold the material neatly over the corners of your pallet to prevent soil spillage.Once complete, lay your pallet flat and fill it with potting soil.
- Next, plant the plants of your choice (obviously not ones which are going to run amok and turn into trees), water, and let the pallet lie flat for a week or two to allow the plants to take hold.
- Once the plants are firmly rooted you can prop your new vertical garden upright.
Frame those photos:
Framing certain photos has probably been on your ‘to do’ list for some time. Here’s where a small, old window frame with plenty of character (and intact glass panes) could come in handy.
- All you need do is print the photos you want to display, preferably as close as possible to the size of the panes.
- Position the pictures to line up with the panes on a piece of thin board (this can be a bit fiddly so be patient).
- Once they line up, glue them into place, following which you can then screw or glue the whole board to the back of the frame.
- The end result is a lovely, unique picture frame. Best of all you can tell everyone you made it yourself.


