Learn how you can create your own upcycled DIY masterpieces by reusing unwanted items around your home.
The term upcycling has permeated the social consciousness over the years but what does it mean? By definition, upcycling is the process of transforming by-products, waste materials, ‘useless’ and/or unwanted products into new materials or products of better quality for better environmental value.
It could be argued that while upcycling stems from the desire to offset environmental impacts, the movement could also be attributed to a desire to be more economical and create something unique. So much of what we buy these days is mass-produced and impersonal so it makes sense that people would want to reconnect with the things they own in this way.
The following are just a few of the things you could ‘upcycle’ around the home.
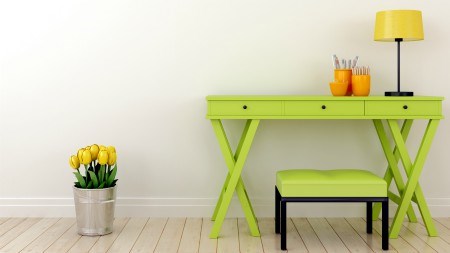
Create your own desk:
Most people require a workspace of some kind at home. With a few basic items, it’s possible to create your own desk without spending a fortune. For instance, you could take an existing counter top and place it on top of two small, sturdy bookshelves. It’s as simple as that.
Alternatively, you could paint and nail crates together and use them as the base for a top of your choice. Small filing cabinets can serve the same purpose while creating some much needed space at the same time. Obviously whatever you do, make sure the structure is safe and stable both for you and any little ones which may be around.
Give your pot plant holder a makeover:
Natural finishes and materials are in. In keeping with this, many pot plant holders have been given the ‘natural’ treatment. But these come at a price. It’s quite easy to create your own trendy pot plant holder with minimal effort and a lot less money.
All you will need is an old pot plant holder (it can be clay or plastic), medium or thick sisal string, very strong glue, a glue brush and old gloves you don’t mind getting covered in glue.
Make sure the exterior of your pot plant holder is clean and dry otherwise things could get messy and your string won’t stick. Turn the pot upside down and apply a generous amount onto the base. Spread out the glue evenly around the base with the glue brush and start wrapping the sisal string around the base and onto the glue. It’s a good idea to tie a knot in the string first to help anchor your wrapping. Continue in this fashion until your pot is covered with string. Voila! You have a trendy, new pot plant holder.
Cottage-craft lights:
Chances are you have some doilies stashed which your grandmother passed on to you. Doilies have fallen out of favour to a large extent but that doesn’t mean they don’t have a purpose. For instance, they can be used to create some beautiful and unique lights.
All you need are a few clear glass jars, clear spray glue, the doilies of your choice, twine, spare buttons and ribbons.
Simply spray the jar on the outside with the glue and carefully apply a doilie. Next, feed the twine and ribbons through a button or two and tie around the lip of the jar to create a nice accent point. Place a tea candle in the centre of the jar, switch off the lights and enjoy!
Wine crate planters:
There’s something awfully chic about up-cycled wine crates. These can be used for various projects but work particularly well in the garden. All you need do is clean off the crate or stain it with a light stain, punch a few holes in the bottom with a screwdriver, add soil and plant the plants you fancy. You can also stack a few crates on top of one another and plant your plants in the top crate to add some height to an area.
Upcycled message boards:
Message boards always come in handy in a busy family household. Instead of buying a dull, standard board from your local supermarket, why not create one with the family?
You’ll need scissors, a tape measure, paintbrushes, an old, framed multi-pane glass window, cork, pins, magnetic primer, chalkboard paint and eraser board.
Clean the windows and frame first. Decide which panes you want to make chalkboards, pin boards and eraser board and work accordingly. Paint the chalkboard panes with magnetic primer. Once dry, paint with chalkboard paint.
Measure and cut cork for the pin board panes, then stick two pieces of cork mat together so that any pins you use will stay firmly in place. If you like you can cover the cork in a fabric. Attach the cork to your panes with a strong multi-purpose adhesive.
Lastly, cut eraser board for your last panes as you did with your cork. Once cut, spread glue on to the relevant panes and press the board into place.
Screw a hook into the back of the frame and there you have it. Your very own, handmade, multi-purpose message board.


