A step by step DIY guide to tiling your bathroom.
Retiling a bathroom is one of the easiest ways to spruce up a sad looking space and even if you can’t afford new fittings, you can get your bathroom looking like a million bucks without necessarily breaking the bank, by doing the job yourself.
We are spoilt for choice when it comes to tiles and there is literally something for everyone across a range of budgets and although it may seem necessary to call in an expert to lay the tiles, the exercise is actually easier than most people think.
Here’s a step by step guide to help you transform your bathroom:
- Ensure you have the right tools before you start. You will need: a tile cutter, a tile saw, a grout spreader, a spirit level, tile nibblers, an adhesive spreader, a tile cutting jig and a gauge stick.
- Prepare all the surfaces to be tiled. The walls need to be clean, dry and smooth.
- Use the gauge stick to help you plot the position of the tiles (this can be done by using a piece of wood and laying several tiles next to it allowing for the inter-tile gaps and marking off each tile on the gauge).
- Starting at the bottom, use a spirit level to draw a perfectly horizontal guide line on the wall for the bottom of your first row of tiles.
- Next, mark the centre of the wall and use your gauge to set out rows of tiles on each side of this centre line. If it turns out that the tiles on the edge measure half the width of one tile, realign the rows sideways by half a tile.
- You now need to place a guide from the last vertical line, using a spirit level, and mark this on the wall.
- Obviously, you will have to tile around things like windows, so use these as a starting point, making sure that the surrounding tiles are equal in size.
- Place cut tiles at the rear of the window frame, using a temporary guide batten at the top of the window to position the first row of tiles.
Tiling adhesive
Remember to use a waterproof adhesive in areas that are going to be exposed to moisture. A wealth of information can be gleaned from your tile supplier as to what adhesive is best used in bathrooms.
- Don’t get too ambitious and only cover about a square meter of wall with the adhesive at a time.
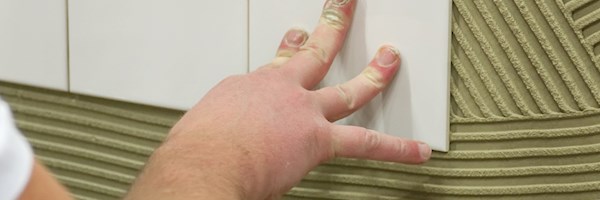
- Use the corrugated edge of the spreader to etch horizontal ridges into the adhesive. Align the first tile with your initial horizontal line and bed it down into the adhesive. Continue tiling the rest of the row, ensuring that you leave gaps between the tiles for the grout. Use a damp cloth to wipe away any adhesive on the surface of the tile.
Once the main area has been tiled, you will need to cut the border tiles in order to fill the gap between the adjacent walls. Reverse the tile, placing the face against the wall. Align the edge of the tile with the wall and mark the top and bottom edges of the tile to fit the empty space, taking into account the gap between tiles. Turn the tile over and use a marker to transfer the marks to the front of the tile and lay out your cutting line. Use a steel ruler to score a straight line on the tile with the tile cutter in one firm stroke. Use a tile-cutting jig to cut the tile to the right size.
To fit tiles around a pipe, mark the centre of the pipe on the top and side edges of the tile and draw lines across these points. Use a circular object that is slightly larger than the diameter of the pipe and draw where the two lines meet. Make a cut through the centre of the of circle and use a tile saw to cut out the remainder of the circle.
As with the adhesive, it’s important to use waterproof grouting in the bathroom. Leave the tile adhesive to harden for at least 24 hours before applying the grout. Use a rubber-bladed spreader to ensure that all of the joints are filled. Use a sponge to wipe any grout from the surface of the tiles and smooth all of the joints with a blunt-ended stick. Once the grouting has dried use a dry cloth to polish the surface of the tiles. It’s advisable to consult with your tiling company as to how long the tiles must stand before use.
Lastly, use a silicon sealant to seal all areas around the bath and sink areas in the bathroom.